build a seat map (numbered seats only)
For cinemas, auditoriums and theatres where every seat has a number, buyers can pick their exact seat. Most events won’t need this.
- 1
Use this only if your venue has numbered seats. Most events won’t need it: for standing crowds, tables or open seating, ticket types (and an optional stage map) are enough.
- 2
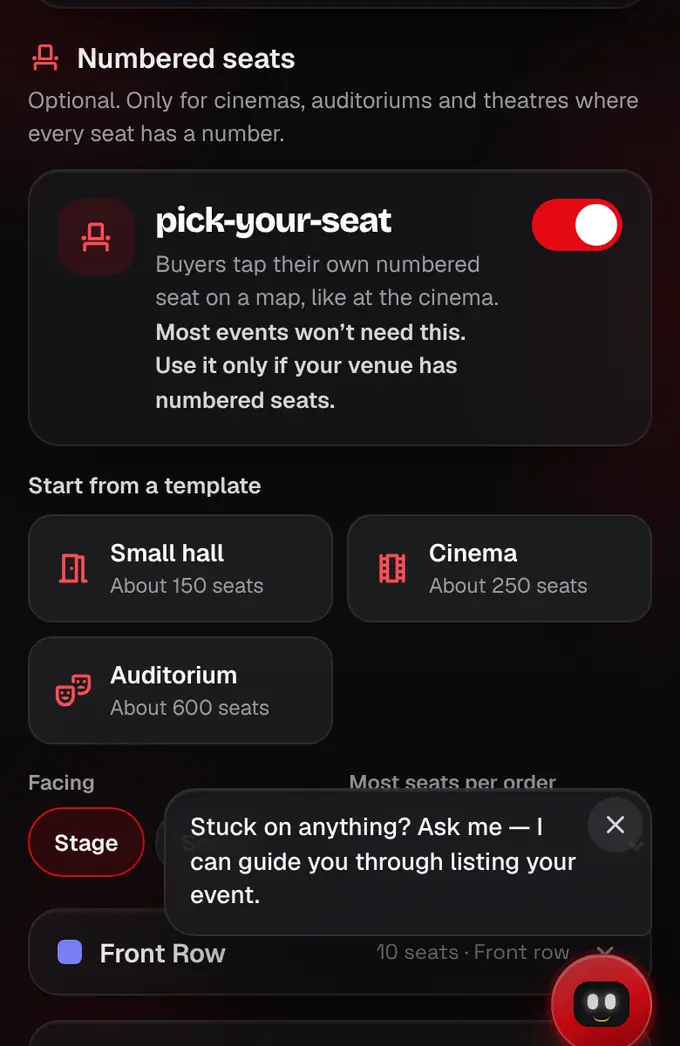
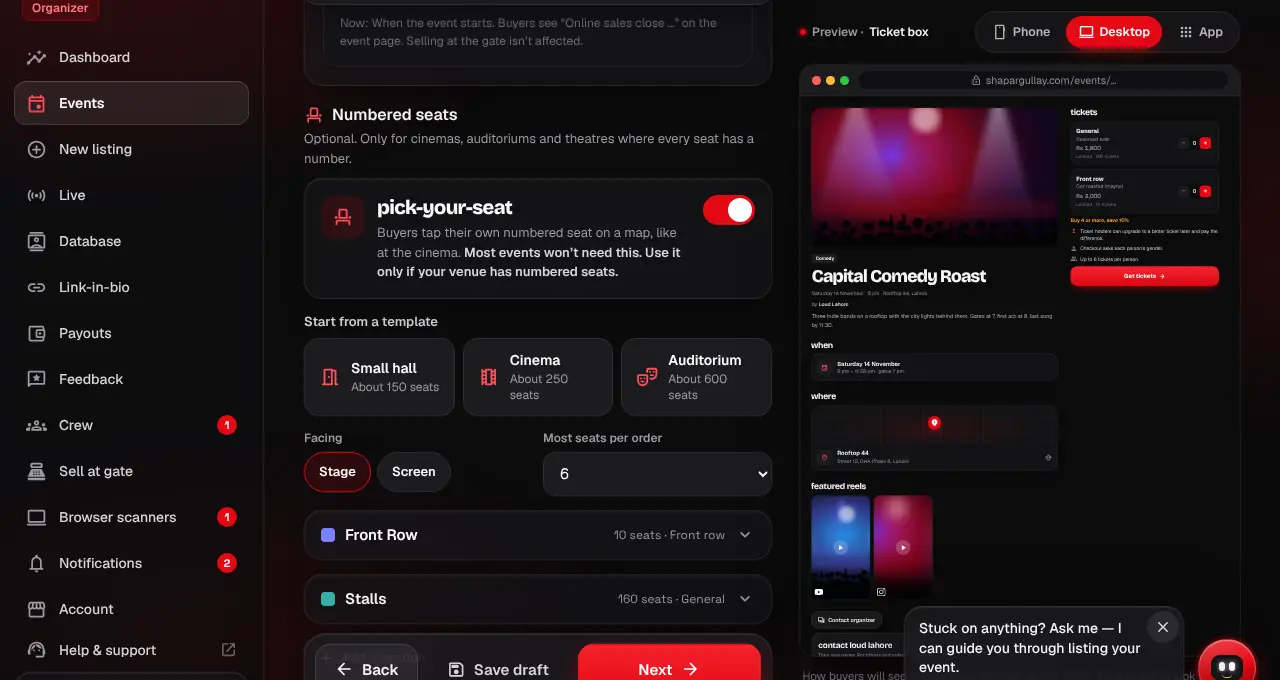
Add your tickets first: each section of the hall is sold as one ticket, so its price is that ticket’s price. Then, under Numbered seats on the Ticket options step of the listing editor (shapargullay.com/organizer/listing or the Organizer app), turn on Pick-your-seat.
- 3
Start from a template: Small hall (about 150 seats), Cinema (about 250) or Auditorium (about 600). Then change each section: its name (like Front Stalls or Balcony), the ticket it sells, how many rows (A, B, C… we skip I and O), seats per row, aisles (the seat numbers a walkway follows) and straight or curved rows.
- 4
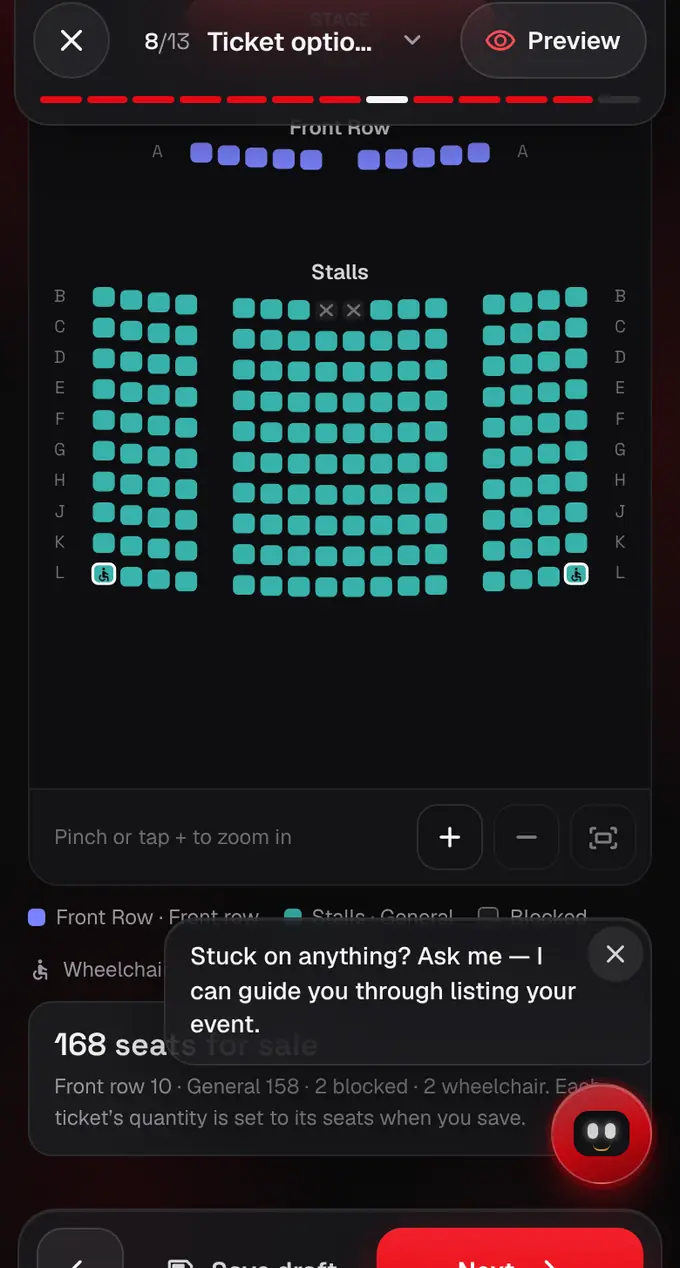
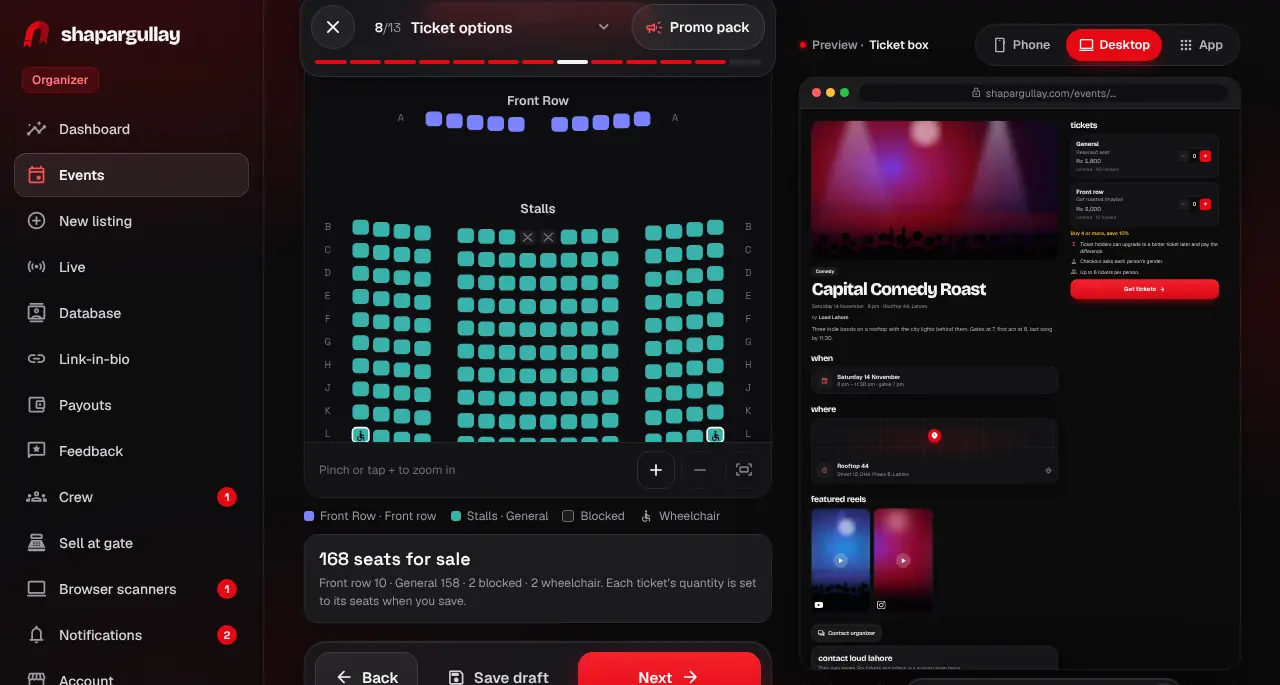
In the preview, tap seats to block them (sponsors, broken seats) or switch to Wheelchair and tap the wheelchair spaces. The count underneath shows how many seats each ticket will sell.
- 5
Save or submit as usual. Each seated ticket’s quantity becomes its number of seats, and our team checks the map when we review your listing. Once the listing is live the map is locked; message us if something needs to change.
- Seats already sold can’t be removed or moved to another ticket, so get the map right before going live.
- Set “Most seats per order” to stop one buyer taking a whole row.
- Every ticket shows its seat, and so do your crew’s scanners.
- Multi-day events don’t use seat maps, seated tickets can’t be upgraded, and they aren’t sold at the gate.